|
Este tutorial es de Estela Fonseca a quien agradezco por permitirme traducir sus tutoriales.
Material
Mis imágenes: AQUI
Eye Cadhy 5: Impact - Eye Candy 5: Textures - Flaming Pear - Mura's Meister - Unlimited 2 Paper Textures
MAPA
Imagens: 1 tube feminino 1 imagem de paisagem * Salve as seleções na pasta Selections do PSP *
Cores originais: Foreground: cor 1 - background: cor 2
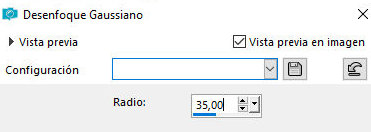
Abra uma nova imagem transparente com 900x730px Selections / Select all Copie a imagem [grafico-de-pinterest] Cole na seleção Select none Layers / Duplicate Feche essa layer (clique no olho) Ative a layer Raster 1 Adjust / blur / Gaussian Blur: 35
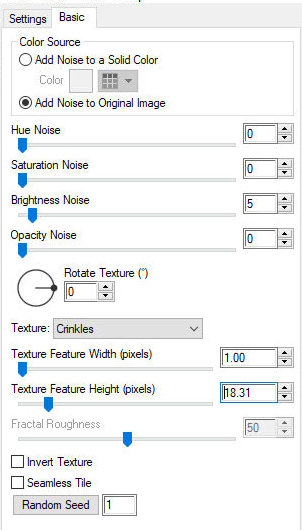
Effects / plugins / Eye Candy 5: Textures / Texture Noise add noise - 0 0 5 00 1.00 18.31 des des 1
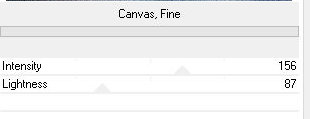
Effects / Plugins / unlimited 2 / Paper Textures / Canvas, Fine - default
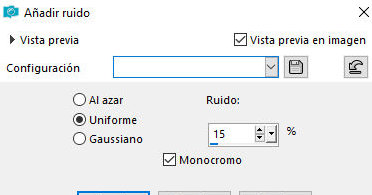
Adjust / Add/Remove Noise / Add Noise uniform 15 x
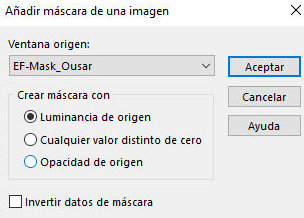
Layers / Duplicate Layers / New Mask layer / From Image / Mask [EF-Mask-Ousar]
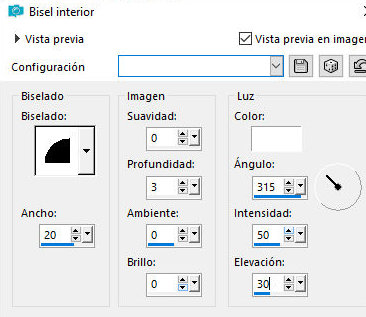
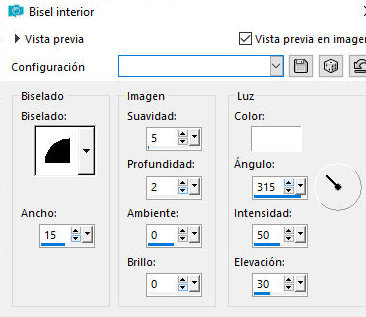
Merge group Effects / 3D Effects / Inner Bevel bv2 20 / 0 3 0 0 / br 315 50 30
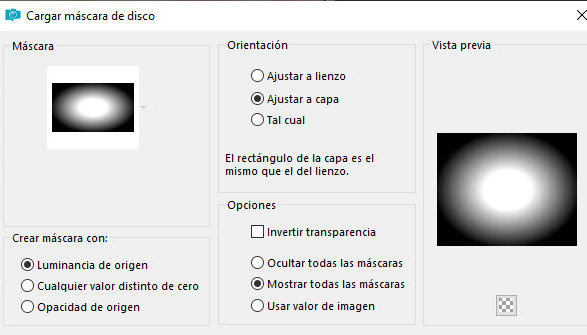
Abra e ative a layer superior Layers / Load mask from disk / Mask [20 20]
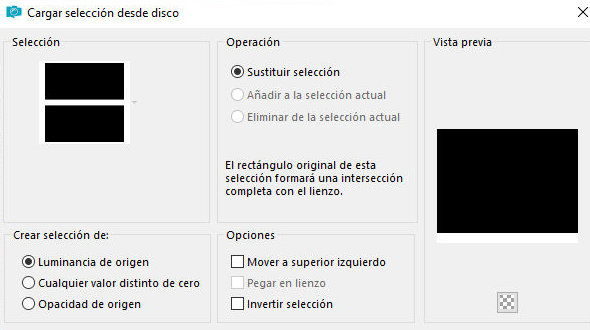
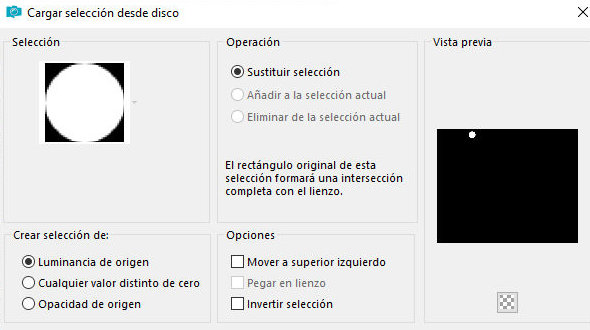
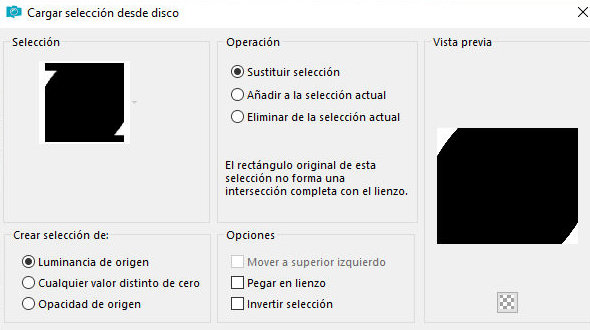
Merge group Layers / Arrange / Move Down Blend Mode: Hard light Layers / Duplicate Blend Mode: Burn Adicione nova layer Selections / Load selection from disk / Selection [ousar-1]
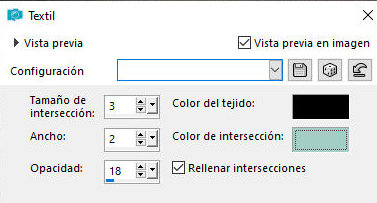
Pinte a seleção com a cor 1 Effects / Texture Effects / Weave - cor #000000/#cor 1 3 2 18 pr cor 1 x
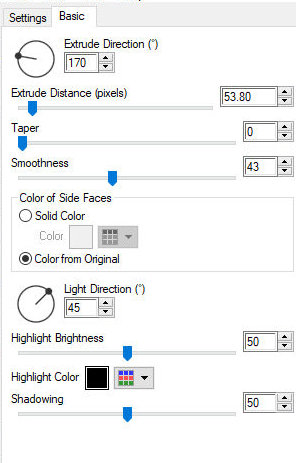
Select none Effects / Plugins / Eye Candy 5: Impact / Extrude 170 53.80 0 43 color from 45 50 pr 50
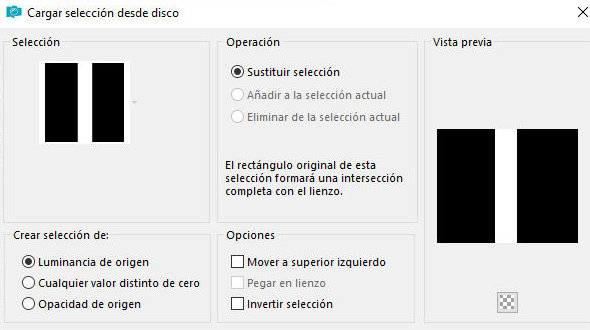
Layers / Duplicate Image / Mirror / Mirror Vertical Image / Mirror / Mirror Horizontal Merge down Ative a layer do fundo - Raster 1 Selections / Load seelction from disk / Selection [ousar-2]
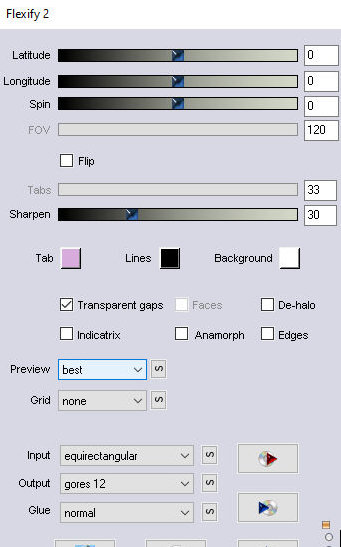
Selections / promote selection to layer Layers / Arrange / Bring to top Select none Effects / plugins / Flaming Pear / Flexify2 0 0 0 120 33 30 equirectangular gores 12
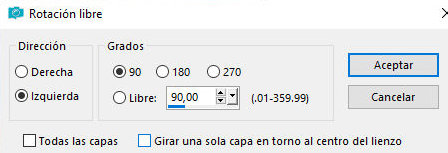
Image / Free Rotate left 90
Effects / Plugins / Eye Candy 5: impact / Extrude - igual anterior
Layers / Duplicate Image / Mirror / Mirror Horizontal Image / Mirror / Mirror Vertical Ative a Pick Tool e configure: X=159,00 - Y=94 - Pressione M Merge down Image / Resize: 75% - all layers desmarcado Adjust / Sharpness / Sharpen Ative a Pick Tool e configure: X=18 - Y=444 - Pressione M Ou posicione como preferir Adicione nova layer Selections / Load selection from disk / Selection [ousar-3]
Coloque a cor 2 no foreground e a cor 4 no background Prepare um gradiente Sunburst 0 x 50/50 50/50
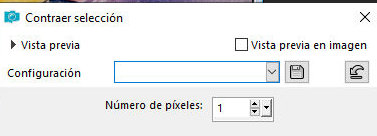
Pinte a seleção com o gradiente Selections / Modify/ Contract: 1px
Effects / Plugins / Eye Candy 5: impact / Glass - preset [clear, no drop shadow]
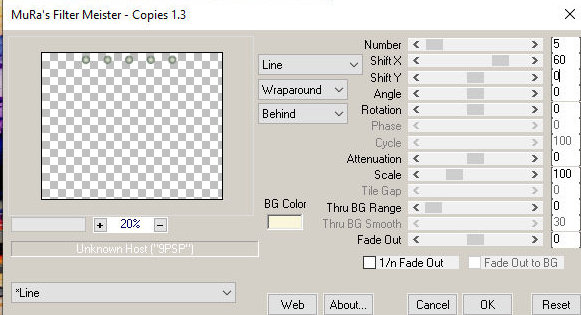
Select none Effects / Plugins / Mura's meister / Copies lines-line-wraparound-behind 5 60 0000 100 0 100 00 30 0
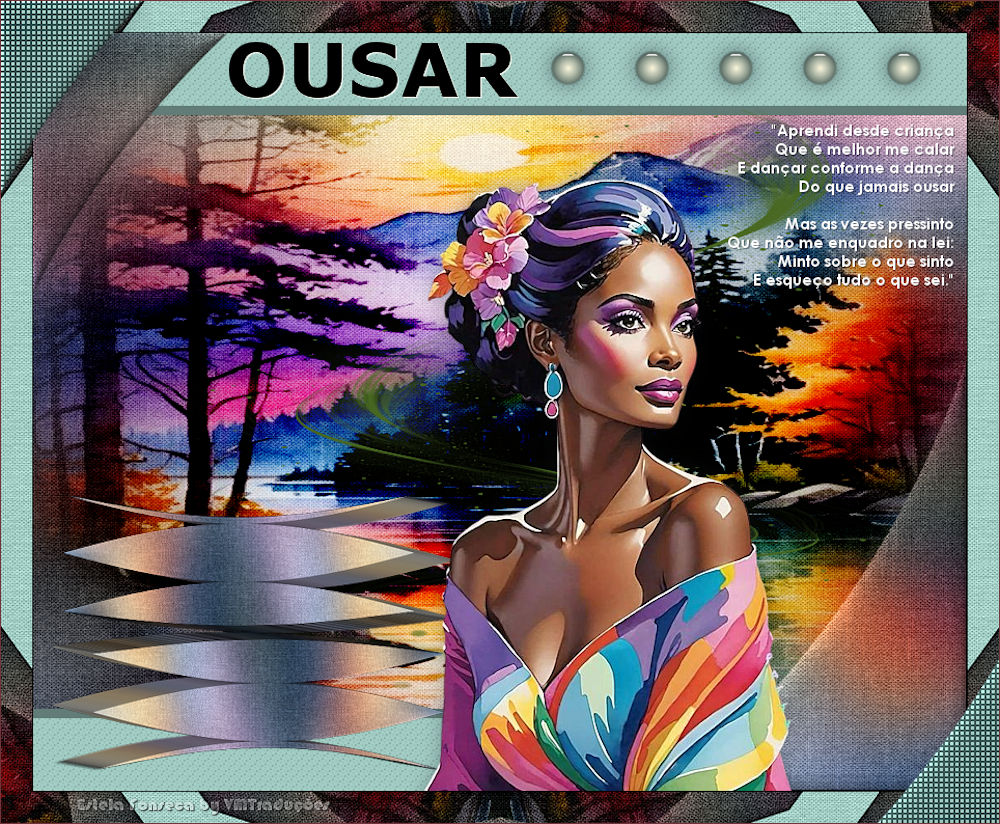
Adjust / Sharpness / Sharpen Image / resize: 75% - all layers desmarcado Drop Shadow: 0 0 50 30,00 preto Ative a Pick Tool e configure: X=479 - Y= (-3) - Pressione M Copie o tube [EF-Ousar_deco-1] Cole como nova layer Não precisa mover Layers / Arrange / Move down - repita 3 vezes Ative a layer superior Copie o tube [Ef-TubePersonagem] Cole como nova layer Image / Resize: 85% - all layers desmarcado Ative a pick Tool e configure:X=306 - Y=140 Drop Shadow: 0 0 30 30,00 preto Copie o tube [Ef-Ousar-Deco-2] Cole como nova layer Posicione como preferir Drop Shadow: 1 1 50 1,00 preto Bordas: 1 px / preto Selections / Select all Borda: 30px / cor 1 Selections / Invert Effects / Reflection Effects / Kaleidoscope - default
Effects / Plugins / Unlimited 2 / Paper Texture / Canvas, Fine - default
Adicione nova layer Selections / Load selection from disk / Selection [[Ousar-4]
Pinte com o gradiente Effects / Texture Effects / Weave - cor #000000 / #cor 1 3 2 18 pr cor 1 x
Select none Effects / 3D Effects / Inner Bevel bv2 15/ 5 2 0 0 / br 315 50 30
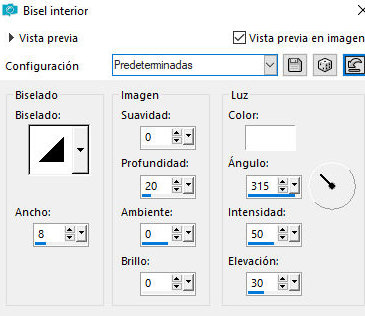
Drop shadow: 0 0 30 30,00 preto Borda: 1px / #70343a Escreva "OUSAR" com uma fonte de sua escolha e configure como achar melhor Aplique o inner Bevel na configuração padrão
Drop shadow: 1 1 100 1,00 branco Coloque as assinaturas Merge all Salve como jpeg
|