|

This tutorial is from Lady Valella who I thank for
letting me translate their tutorials.

Original here

Tubes

Tubes: Renée
Material

Plugins
Mehdi - Eye Candy 5: Impact - AP [Lines]
- AAA Frames
You can find these plugins on the websites of:
Renée
Cloclo
You can also find this tutorial translated into these languages:
(Click on the flag)


|
Notes:
> Open the material / Duplicate (shift+d) / Close the originals
> Change the blend mode of the layers to match their colors.
> In older versions of PSP, Mirror Horizontal=Mirror / Mirror Vertical=Flip /
Pick tool=deformation
> Open the masks in psp and
minimize
>Adjust the size of the tubes according to your images
|
SCRIPT
Images:
3 tubes according to the theme
*
Material

*
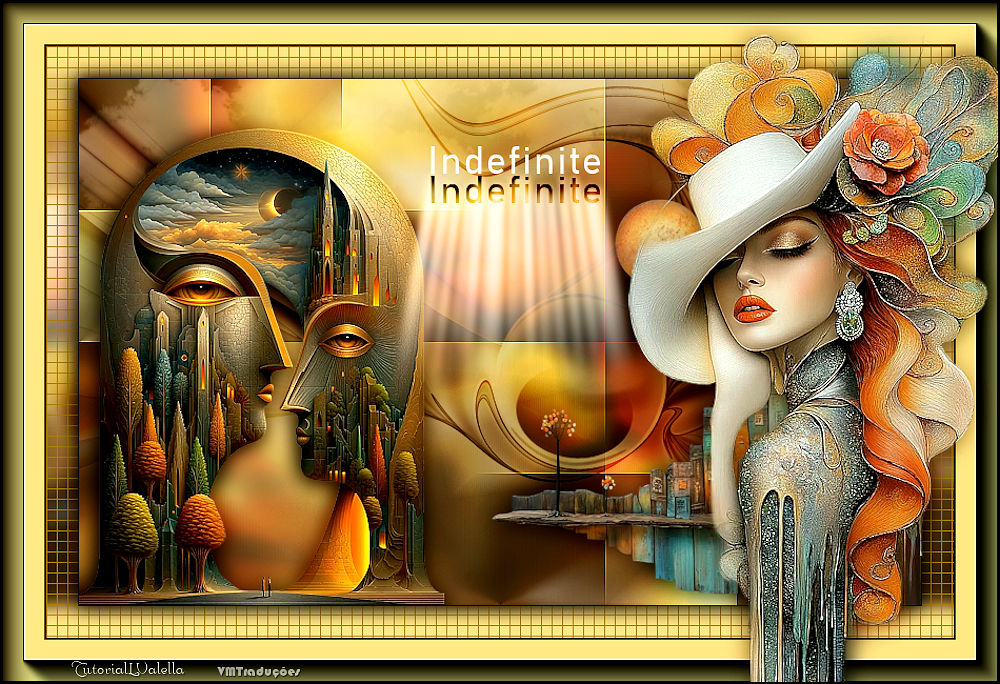
Step 1
Open a new transparent image with 800x500px
Colors: Foreground: #fbe491 - Background: #4e240c
Prepare a Linear gradient
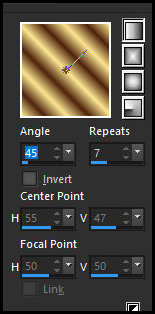
Paint the image with this gradient
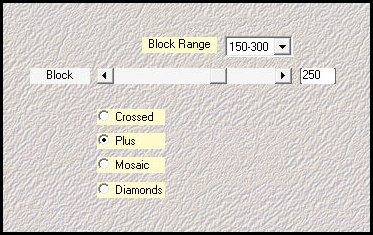
Effects / Plugins / Mehdi / Sorting Tiles
Effects / Edge Effects / Enhance
Add a new layer
Selections / Select all
Copy [Renee-TUBES-Mai2025-31]
Paste into the selection
Adjust / Blur / Gaussian Blur:10
Select none
Effects / Image Effects / Seamless Tiling - default
Blend mode: Hard Light / Opacity=60%
Step 2
Copy [Nuvole]
Paste as a new layer
Activate the Pick Tool (K) and configure: X=(-53) Y= (-69) Press M
Blend Mode: Luminance (L) / Opacity: 34%
Add new layer
Paint with black color
Layers / New Mask Layer / From Image / Mask [MakTex023]
Merge group
Image / Mirror / Mirror Vertical
Blend Mode: Overlay
Layers/Duplicate
Opacity: 60%
Step 3
Copy [Renee-TUBES-Juin-2025-82.]
Paste as new layer
Imae / Resize: 45% - all layers unchecked
Position bottom left
Layers/Duplicate
Adjust/Blur/Gaussian Blur: 10
Blend mode: Multiply
Layers / Arrange / Move Down
Activate the top layer
Adjust/Sharpness Sharpen
Step 4
Copy [Renee-TUBES-Juilet-aout-2025-16]
Paste as a new layer
Image / Resize: 45% - all layers unchecked
Activate the Pick Tool (K) and set: X=391 Y=88 Press M
Layers / Duplicate
Adjust / Blur / Gaussian Blur: 10
Blend mode: Multiply
Layers / Arrange / Move Down
Activate the Top Layer
Adjust / Sharpness / Sharpen
Step 5
Copy [TitoloIndefinite]
Paste as a new layer
Activate the Pick Tool (K) and set: X=334 Y=64 Press M
Rename the layer to Titile1
Layers / Duplicate
Rename to Title 2
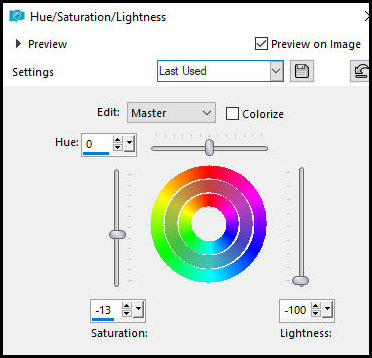
Adjust / Hue and Saturation / Lightness
Move below the title as shown in the screenshot

Layers / Duplicate
Rename to Title 3
Close this layer (click on the eye)
Activate the Title 2 layer
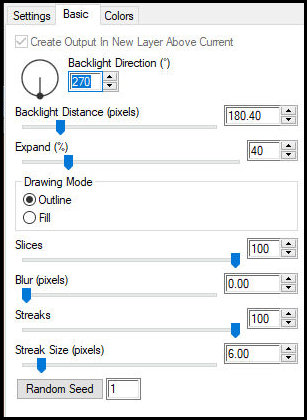
Effects / Plugins / Eye Candy 5: Impact / Backlight - Preset
[Forward Fog Streaks]
Blend mode: Luminance (L)
Open the Title 3 layer and activate
Blend mode: Overlay
Step 6
Image / Add borders / 1px / black
Selections / Select all
Image / Add borders / 30px / #fbe491
Effects / Image Effects / Seamless Tiling - Default with Direction=Horizontal
Selections/Invert
Adjust/Blur/Gaussian Blur: 8
Effects / Plugins / Ap[Lines] / Silverlining(in color) change
according to your colors

Selections/Invert
Drop shadow: 0 0 100 30.00 black
Select none
Image / Add borders / 1px / black
Step 7. Selections / Select all
Image / add borders / 40px / color #fbe491
Selections / Invert
Effects / Plugins / AAA Frames / Photo Frame
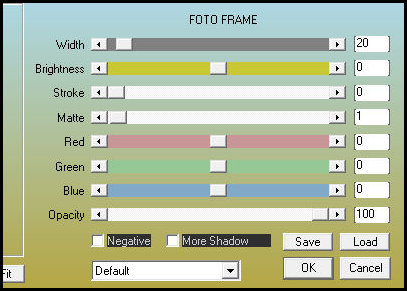
Repeat the Photo Frame
Select none
Step 8. Copy [Renee-TUBES-May2025-31]
Image / Resize: 60% - all layers unchecked
Position to the right near the border
Layers / Duplicate
Adjust / Blur / Gaussian Blur: 10
Blend Mode: Multiply
Layers / Arrange / Move Down
Activate the top layer
Adjust / Sharpness / Sharpen
Image / Add borders / 2px / black
Add credits
Merge all
Save as jpeg

|