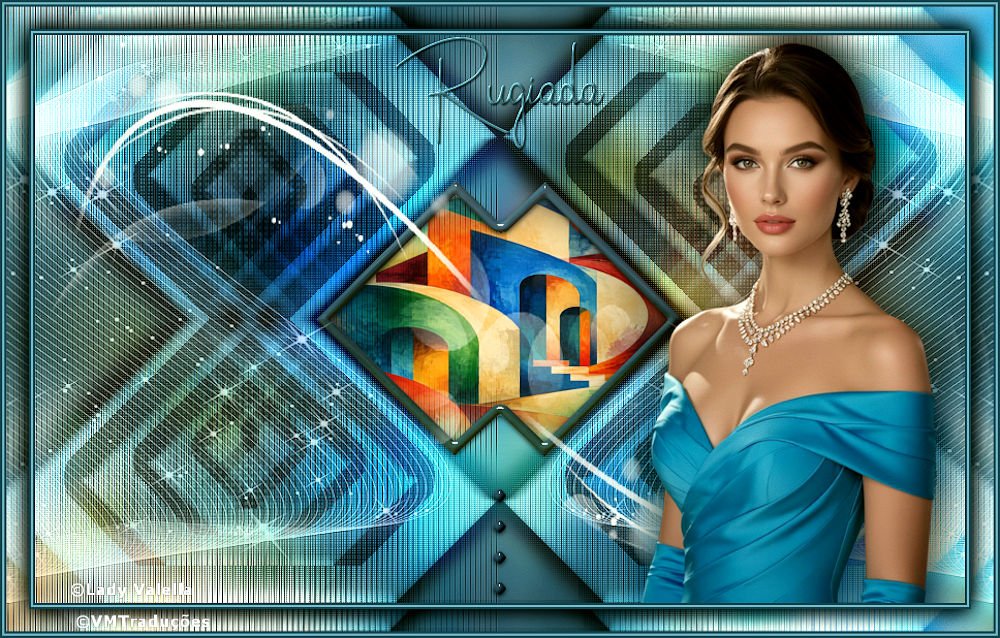
(imagem original de lady valella)

(minha versão)


This tutorial is from Lady Valella who I thank for letting me translate their tutorials.


Original
here


Tubes

Material


Plugins

AP [Lines] - Unlimited 2 - Penta.com - Simple - Eye Candy 5: Impact


You can find these plugins on the websites of:

Renée
Cloclo


You can also find this tutorial translated into these languages:
(Click on the flag)


Notes:
> Open the material / Duplicate (shift+d) / Close the originals
> Change the blend mode of the layers to match their colors.
> In older versions of PSP, Mirror Horizontal=Mirror / Mirror Vertical=Flip / Pick tool=deformation

> Open the masks in psp and minimize
>Adjust the size of the tubes according to your images


TUTORIAL

Required:

1 female tube

1 abstract image

1 landscape

***

Save the selections to the “Selections” folder in PSP

***

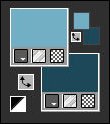
01. Colors: Foreground: #72afc4 - Background: #1f485a

Open a new transparent image, 900x550px

Fill the image with the background color

Copy [Cascata-Miste-LV26]

Paste as a new layer

Adjust - Blur - Gaussian Blur: 20

Adjust > Sharpness > Sharpen

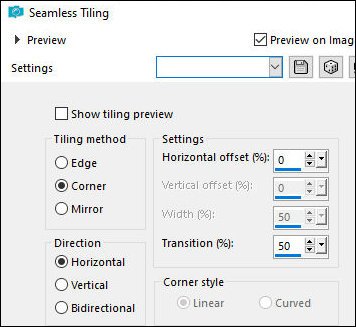
Effects > Image Effects > Seamless Tiling > default

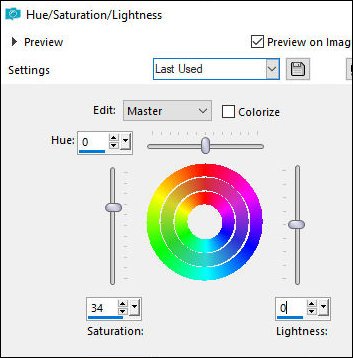
Adjust > Hue and Saturation > Hue/Saturation/Brightness


02. Layers > Duplicate

Effects > Plugins > AP[Lines] > SilverLining


Effects > Plugins > unlimited 2 > Tile & Mirror > Mirrored & Scaled

Effects - Edge Effects - Enhance

Blend Mode: Luminance - Opacity: 90%

Merge visible


03. Copy [Cascata-Misted-LV26]

Paste as a new layer

Adjust - Blur - Gaussian Blur: 20

Blend Mode: multiply


04. Activate the Merged layer

Selections - Load Selection from Disk - Selection [2-FL-LV25]

Selections - Promote Selection to Layer

Layers - Arrange - Bring to Top

Select None

Objects - Align - Center in Canvas

Effects - 3D Effects - Inner Bevel


05. Effects - Reflection Effects - Rotating Mirror - default


Drop shadow: 0 0 100 30 black

Effects - Plugins - Penta.com - Color Dot - default


Effects - Reflection Effects - Feedback


Pick tool (K) X=(-36) Y=0 Press M

06. Layers - Duplicate

Image - Mirror Horizontally

Merge Down

Effects - Plugins - Simple - Top Left Mirror

Effects - Image Effects - Seamless Tiling


Drop Shadow: 0 0 100 30 black

Blend Mode: Overlay or another of your choice

07. Add a new layer
Selections - Load Selection from Disk - Selection [LV-Rugiada]
Copy the misted [787 P-AI-LV26]
Paste into the selection
Adjust - Sharpness - Sharpen
Selections - Modify - Select selection borders

Add a new layer
Fill with the background color
Effects - 3D Effects - Inner Bevel - same as before
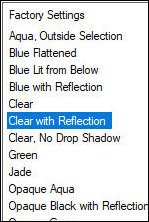
Effects - Plugins - Eye Candy 5: Impact - Glass - preset [clear with reflection]

Select none

08. Add a new layer
Fill the layer with white
Layers - New Mask Layer - From Image - Mask [003-Silvie-Mask-Abstract-Shiny23G]
Merge group
Pick Tool (K) X=(-374) Y=(-3) Press M
Layers - Duplicate
Merge down
Layers - Duplicate
Image - Mirror Horizontally
Merge down
Blend mode: Luminance (L) - Opacity: 80%
Adjust - Sharpness - Sharpen

09. Add a new layer
Fill the layer with white
Layers - New Mask Layer - From Image - Mask [009-Silvie-Mask-Abstract7De]
Merge group
Blend mode: Hard Light or another of your choice

10. Stroke - 2px - background color
Stroke - 2px - foreground color
Stroke - 2px - background color
Duplicate (Shift+D) - minimize; we’ll use it later
Return to your work

11. Click the UNDO arrow 3 times to remove the 3 frames
Copy [642 D-AI-LV26]
Paste as a layer
Position it on the right
Layers - Duplicate
Adjust - Blur - Gaussian Blur: 20
Blend Mode: Multiply
Layers - Arrange - Move Down

12. Select the top layer
Copy [DecoRugiada=LV26]
Paste as a new layer
Objects - Align - Bottom

13. Stroke - 2px - Background color
Stroke - 2px - Foreground color

Border - 2px - background color
Selections - Select All
Border - 28px - white
Selections - Invert
Maximize the image saved above and copy it
Paste into the selection
Selections - Invert
Drop shadow: 0 0 100 30 black
Repeat the drop shadow
Select None
Copy [Titolo Rugiada]
Paste as a new layer
Position it at the top as shown in the template
Merge Visible
Add the credits
Merge All
Save as a JPEG