|
You will need:
1 female tube
1 decorative tube
* Place the selections in the PSP Selections folder
*
Step 1
Original Colors
Open a new transparent image with
800x600px
Selections / Select all
Copy the image [background]
Paste it into the selection
Adjust / blur / Gaussian Blur: 20
Select none
Effects / Plugins / Unlimited 2 / BKG Designer sf10 IV /
Blue Berry Pie
Step 2
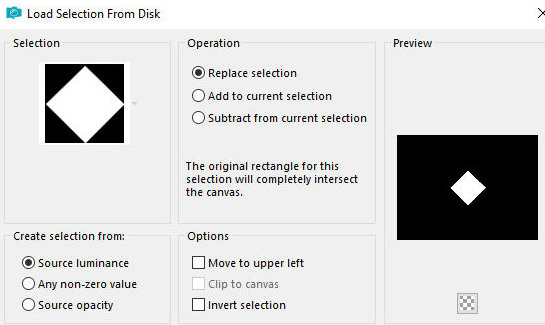
Selections / Load selection from disk / Selection [#1-FL-LV25]
Selections / Promote selection to
layer
Effects / plugins / penta.com / Color dot
[145 10 255 255 255]
Select none
Drop shadow: 0 0 85 20 black
Layers / Duplicate
Image / Mirror / Mirror horizontal
Merge down
Step 3
Activate the Raster 1 layer
Layers/Duplicate
Layers / Properties / Blend Mode: Screen
Effects / Plugins / Unlimited 2 / BKG Designer sf10 IV -
Blue Berry Pie
Effects / edge Effects / Enhance
Step 4
Selectins / Load selection from disk / Selection [#2-FL-LV25]
Add new layer
Paint the layer with color #d15161
Effects / Plugins / AP [Lines] / Silverlining
[8 -4 10 0 0 0 - line options vertical]
Selections/Modify/Expand: 25
Activate the layer below
Selections / Promote selection to layer
Activate the Raster 2 layer
Merge down
Select none
Drop shadow: 8 0 85 20 black
Layers/Duplicate
Image / Mirror / Mirror Horizontal
Merge visible
Layers/Duplicate
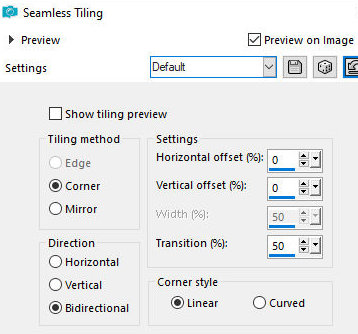
Effects / Image effects / Seamless Tiling - default
[default]
Layers / Properties / blend Mode: Hard
Light
Step 5
Layers/Duplicate
Effects / Plugins / Mura's meister / Perspective Tiling
[80 0 0 20 0 0 100 255]
Layers / Properties / Blend Mode:
Normal
Drop Shadow: 0 0 65 20 black
Selections / Load selection from disk / Selection [3-FL-LV25]
Activate the merged layer
Adjust/Blur/Gaussian Blur: 8
Activate the Copy of merged layer
Adjust/Blur/Gaussian: 8
Select none
Step 6
Continue with the Copy of Merged layer
Selections / Load selection from disk / Selection [1-FL-LV25]
Selections / Promote selection to
layer
Select none
Layers / Arrange / Bring to top
Effects / Image Effects / Offset
[400/0]
Layers / Duplicate
Image / Mirror / Mirror Horizontal
Merge down
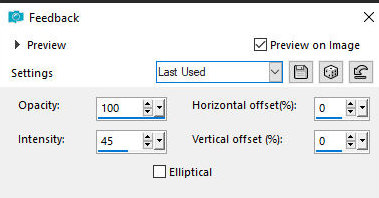
Effects / Reflection Effects / Feedback
[100 45 0 0 des]
Layers / Properties / Blend mode: Hard
Light (or another according to your colors)
Step 7
Copy the tube [DecoroRombi]
Paste as a new layer
Activate the Pick Tool and configure: X=186 - Y=324 -
Press M
If you prefer, colorize with the
colors used using your preferred method
Add a new layer
Selections / Load selection from disk / Selection [4-FL-LV25]
Set the color #6a358b in the
foreground and the color #ef3349 in the background
Prepare a Linear gradient
[45 0 des]
Paint the selection with this gradient
Select none
Effects / 3D Effects / Inner Bevel
[bv 2 11 25 8 0 0 br 315 50 30]
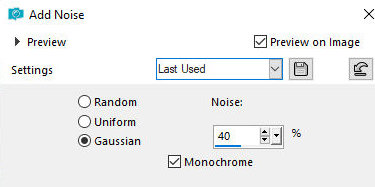
Adjust / Add/Remove Noise / Add Noise
[gaussian 40x]
Layers/Duplicate
Image / Mirror / Mirror horizontal
Image / Flip / Flip horizontal
Merge Down
Drop shadow: 2 4 75 5 black
Selections / Load selection from disk / Selection [5-FL-LV25]
Add new layer
Color the selection with color #1c2144
Effects / plugins / Penta.com / Color Dot - same as
above
Repeat Color dot
Drop shadow: 0 12 65 20 black
Drop Shadow: 0 -12 65 20 black
Select none
Copy the tube [libri_LV]
Paste as a new layer
Position at the bottom left as shown in the model
Drop Shadow: 0 0 55 25 black
Copy the tube [1022-TD(AILValella25)]
Paste as a new layer
Position on the right as shown in the model
Drop Shadow: 0 0 55 25 black
Copy the title [TitoloB] or [titoloN] (depending on your
colors)
Position as shown in the model or as you prefer
Step 9
Borders:
2px / black
5px / #ef3349
15px / #6a358b
5px / #ef3349
Selections / Select all
Border: 35px / any color
Effects / Image Effects / Seamless Tiling - default
[default]
Selections / invert
Adjust / Blur / Gaussian Blur: 15
[15]
Effects / Plugins / AP [Lines] /
SilverLining
[10 -1 10 000 line options vertical]
Effects / Plugins / penta.com / Color
Dot
[145 7 255 255 255]
Repeat Color Dot
Selections/Invert
Drop Shadow: 5 5 75 15 black
Drop Shadow: -5 -5 75 15 black
Select none
Edges:
5 px / #ef3349
2 px / #000000
Put signatures
Merge all
Save as jpeg |